Strategic CTO guidance for companies at inflection points
Fractional and interim CTO services for founders, PE operators, and boards navigating scaling challenges, compliance requirements, and technical transitions.
When This Makes Sense
I help at inflection points, not everyday problems
Scaling from 10 to 100 engineers
When hiring faster creates chaos, not velocity. The architecture that got you here won't get you there.
SOC 2, HIPAA, PCI compliance
Enterprise deals require certifications your org isn't built for. Compliance without killing velocity.
Tech debt reaching critical mass
Every sprint includes firefighting. Understanding what to pay down, tolerate, or rewrite.
M&A integration or carve-out
Two tech stacks meeting, or one separating. Due diligence, integration playbooks, team alignment.
Platform stability crisis
Incidents spike, customers churn, team doesn't know where to start. Stabilization in 30–60 days.
AI product strategy
"We should do something with AI" meets reality. Separating hype from value, build vs buy decisions.
Engagement Models
Not every situation needs a full-time CTO
Fractional CTO
Ongoing strategic leadership, typically 2–3 days per week. Senior judgment without full-time commitment.
- Architecture and technical strategy
- Engineering team leadership
- Board and investor communications
- Vendor and build/buy decisions
- Hiring strategy and org design
Interim CTO
Full-time coverage during transitions. For sudden departures, pre-acquisition stabilization, or permanent search.
- Full operational ownership
- Team stabilization and retention
- Process and delivery continuity
- Candidate evaluation support
- Clean handoff to permanent CTO
CTO Insights
Judgment over jargon
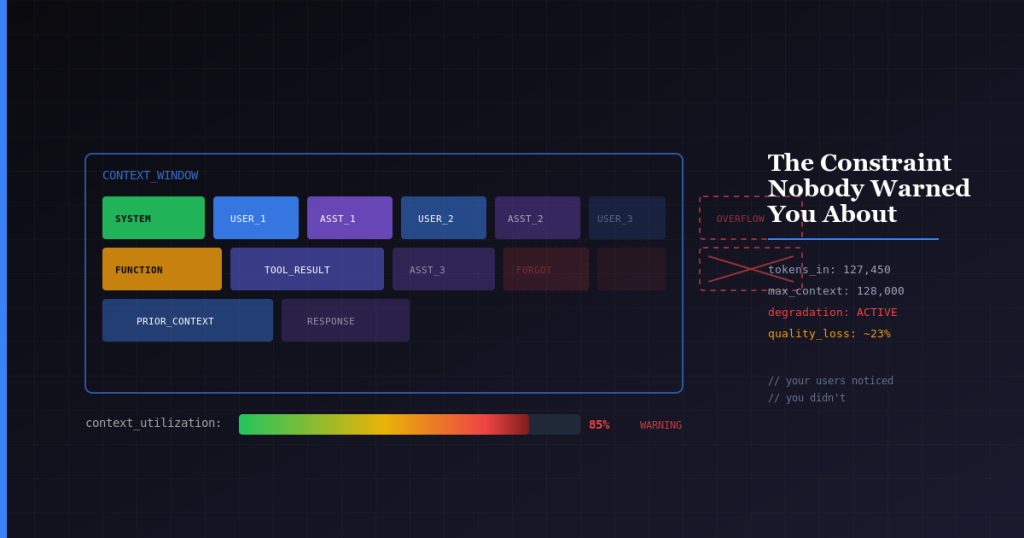
Your LLM Has a Memory Limit. Your Architecture Doesn’t. Here’s How to Solve It.
Your LLM will forget things. Important things. And it won’t tell you when it happens. I learned this the expensive way after 15 years building...
📈 Storage Breakpoints: S3 vs On-Prem (with numbers)
Assumptions (conservative, operator-realistic): < 300 TB Metric S3 On-prem Annual storage cost ~$10k ~$5k Infra headcount 0 0.25–0.5 FTE People cost $0 $50k+ Net economics...
Facebook verify my business button grayed out – how to Enable?
NOTE: This works. We have just tested it. Hi Just went through this. Facebook support was very unhelpful honestly. This is the workaround that worked...
Playbooks & Templates
Frameworks that work in real organizations
90-Day CTO Onboarding Checklist
What to assess, defer, and how to sequence decisions
CTO Due Diligence Checklist
For boards and investors evaluating technical leadership
Stabilize Engineering in 60 Days
Crisis playbook for post-acquisition or leadership gaps
Tech Debt Interest Calculator
Quantify the carrying cost of architectural decisions
Industry Experience
Deep context matters more than generic advice
If this sounds like your situation, let's talk
No pitch decks. No sales process. Just a conversation about what you're dealing with and whether I can help.
Book a 30-minute call →