Installing php-mcrypt should be a cakewalk on Mac OS X with brew using the command “brew install php54-mcrypt” but at times things do not work out this easily and that is when you have to end up building and installing php54-mcrypt manually. It is an easy process and here is how you can do it. Another way to install PHP-Mcrypt is using Macports.
Step 1: Install mcrypt library using homebrew
sudo brew install mcrypt
You might get an error that says cowardly refusing to sudo while using brew, that can be easily fixed as well, see this.
Step 2: Download and extract PHP using this link into a folder.
Step 3: Next step is to open the mcrypt folder in a command line and issue the phpize command and then follow it using the regular make and install commands. You might want to use the following commands for the entire process:
cd ~/Downloads
wget https://github.com/php/php-src/archive/PHP-5.4.17.zip
unzip PHP-5.4.17.zip
cd php-src-PHP-5.4.17/ext/mcrypt/
/usr/bin/phpize
./configure
make
sudo make install
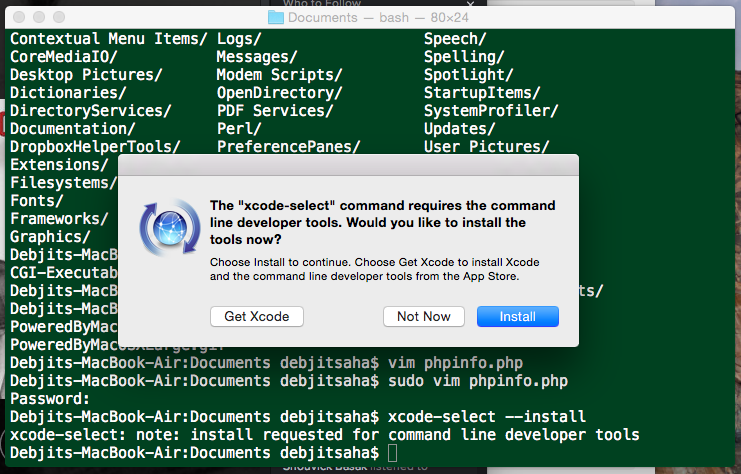
In the above series of steps,if for some reason you get blank outputs from the various property values after running the /usr/bin/phpize command, then you need to install xcode developer tools before proceeding further. Here is how you do it.
xcode-select –install
Running the command above will bring up a prompt as shown below:

If you encounter errors like the `brew link` step did not complete successfully or mcrypt.h not found then these can be fixed by asking brew to link mcrypt properly – issue the following commands in your terminal:
sudo brew link mcrypt
Try the following command in case above fails:
sudo brew link –overwrite mcrypt
After you are done with this, all you need to do is open the php.ini file available in /etc/ folder and add the following lines towards the end of the file:
extension=mcrypt.so
extension_dir=/usr/lib/php/extensions/no-debug-non-zts-20100525/
The second line extension_dir is optional. Restart Apache using sudo apachetctl restart command and you are all set 🙂
PS: If you encounter a brew link error then you can take a look at this post (browser towards the end of that article)