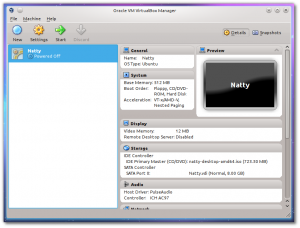
How To Install VirtualBox 4.0 In Ubuntu
 VirtualBox is one of my favorite tools to test out stuffs which might otherwise mess up my current Ubuntu installation. It is a great tool to have when you are on Linux and want to do something on Windows or it could be the other way round.
Anyway for the last couple of months Oracle has been working on VirtualBox 4.0. However, if you want to install VirtualBox 4.0 to test it out, read on.
There are a couple of ways to install VirtualBox 4.0. You can download the .deb file and install it manually. However, that will leave your installation outdated when new versions arrive. So, we are going to do it the other way by using the VirtualBox repository.
Oracle maintains a repository for VirtualBox. So, the first thing we are going to do is add the repository. Open the Terminal (or Konsole in Kubuntu) and execute the following command:
sudo nano /etc/apt/sources.list
You can use any text editor in place of nano.
Then, add the line given below to the file (source.list) opened in a separate line, and then save and close it.
deb http://download.virtualbox.org/virtualbox/debian maverick contrib
You have to replace maverick with the appropriate name if you are on another Ubuntu version. However, I am on Maverick and do not which other versions are supported.
After that you have to download the Oracle public key and add it. To do that execute the two commands below in the Terminal.
wget http://download.virtualbox.org/virtualbox/debian/oracle_vbox.asc
sudo apt-key add oracle_vbox.acs
Before we start the installation, you have to remove VirtualBox 3.2 if you have installed it. Execute the command below to do it.
sudo apt-get remove virtualbox-3.2
After that it is the usual update and install.
sudo apt-get update
sudo apt-get install virtualbox-4.0
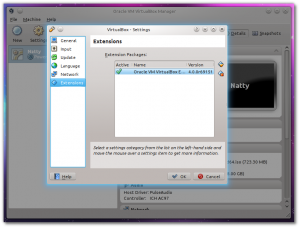
With VirtualBox 4.0, Oracle has moved most of the extra functions like USB support etc. as extensions. So, you need to add them separately. Right now only one extension pack is availeble. It provides support for USB 2.0 devices, VirtualBox RDP and PXE boot for Intel cards. Download it by clicking on the link below:

Download VirtualBox 4.0 Extension
After that start up VirtualBox, and go to Files > Preferences > Extensions. From there you can add the extension package you just downloaded.
And before we end, install the Dynamic Kernel Module Support Framework to ensure that a kernel update of your system does not break your VirtualBox installation.
sudo apt-get install dkms