How to change the default port and IP address for a website in Microsoft IIS web server?
 An web server can be used to host a plethora of websites simultaneously but on different IP addresses and ports in order to reduce hosting charges. This is technology commonly known as virtual hosting. Well, in this article we will tell you how to change the default port number and IP address for a website in Microsoft IIS web server so that you can add more websites and run them simultaneously.
Step 1: Open up the IIS web server control panel. (how to)
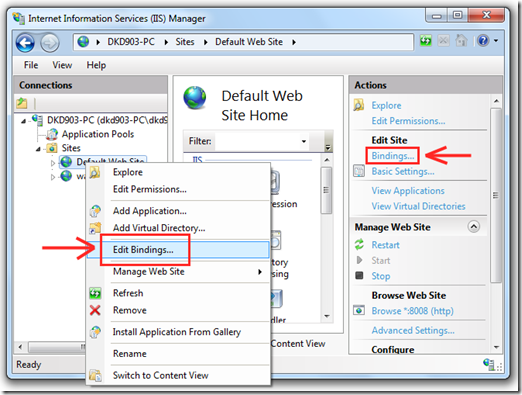
Step 2: In the control panel, select the website whose IP and port settings you want to edit from the menu on the left column. Now right click on it and select “Edit Bindings” from the options menu. You can also edit the bindings for the website from the menu options in the right hand column. Check this screenshot.
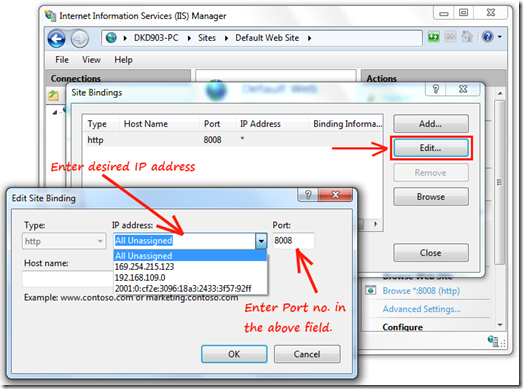
Step 3: The IP and port manager shows up next. Now you can choose your desired port numbers and IP addresses and enter them in this box. Check this screenshot below.
Click on OK and save your settings. After this you need to restart your IIS server in order to load the new settings. From now on you can access your website at the newly configured port at http://yourdomain:port-number. In case you want to know how to configure multiple IP addresses on one computer the you should read this article. Although it explains about the process of adding IPs on one card in Windows XP but the same method works for Windows 7 too.

