How to make a Video DVD?
Suppose you have downloaded your favorite television series or a new movie, and you want to watch it in on your Television Set in your living room, what options do you have? Use something like this, or this? Or, you could try this..
You just need a simple software, DVD Flick. Even though there are a number of good DivX to DVD converter software available, but most of them require you to buy that software to use all of the features and are not all FREE. But DVD Flick comes to you for absolutely no money!
DVD Flick is Open-Source, efficient and very easy to use. Trust us, you'd be bowled over by the simplicity of this software and the number of features it provides.
Let's start..
Step 1: The Basics
First you need to download DVD Flick, from here, and then install it wherever you want on your computer.
Step 2: Starters
Open DVD Flick, click on Add Title on the bar on the right side. Add the video files which you want to convert to a DVD. You can select multiple files.
The number of files you can add depends upon the Target Size of your dvd, like DVD (4.3 GB) or DVD DL (7.9 GB) . The yellow bar on the left side shows you the amount of space you will be using in your DVD.
Step 3: Destination Folder
Select a destination folder where DVD Flick should store the DVD Files. In simple terms, you need to specify any folder but make sure that hard disk has sufficient amount of space. The amount of space required is specified next to the Project Destination Folder just above the Browse button.
Step 4: Settings
DVD Flick, even though being open source provides many functions of a paid software, it lets you add Menus, Subtitles, Specify the target size, Target Format, it even lets you burn your project directly to a DVD, or create an ISO image for burning the image later.
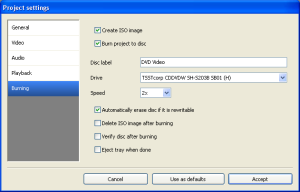
Project Settings->Only 3 of these tabs would be used most of the times, General (Target Size, Encoder Priority), Video (Target Format, Encoding Profile), Burning.
- General->Here you can specify the Target Size (Project Settings->General), Encoder Priority (how much resources should the encoding process take, keep it normal or anything above normal)
- Video->Specify the Target format (PAL - Europe, Asia, Africa.., NTSC-America), Encoding Profile (if you keep it fastest, the quality would reduce, if you keep it Best, the quality would be good but it will take a lot of time to encode, Normal should be fine for everyone)
- Audio->Specify the audio channels, audio stream bitrate, by default both of them are set to Auto
- Playback->Specify how the titles should play.
- Burning->Burn the project directly to a DVD, or create an ISO image. If you plan to burn the project directly to a DVD, then make sure that you select the right DVD drive, and have a blank DVD inserted in your chosen DVD drive.
Menu Settings let you add Menus to your DVD. There are 6 templates to choose from.
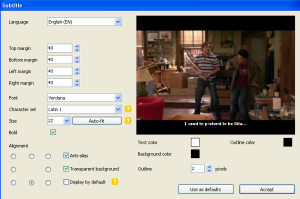
Edit Title->Present in the right hand side menu, this option would let you edit the Target Aspect Ratio (detected by default depending on the video 16:9, 4:3), create Chapters, add Audio Tracks, Video Sources and more importantly Subtitles! You can add and edit the Subtitles (change text color, font, size, edit the background etc.)
Step 5: Create DVD
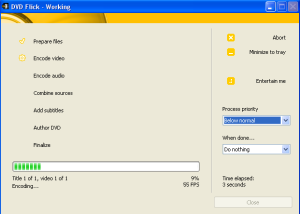
Just click on the Create DVD button on the upper menu. A prompt might appear warning you that the existing folder contents would be deleted. If you have used DVD Flick to create a DVD before, then you need to move/burn those dvd files, or else the entire contents of that folder would be deleted.
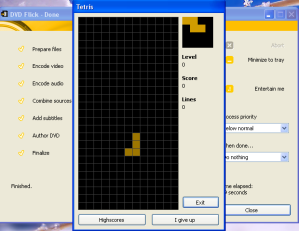
This process usually takes a lot of time depending on the encoding profile. So, to keep yourself entertained, you can play tetris while the process completes!
Step 6: Burn the DVD
If you had checked the 'Create an ISO image' option in the Project Settings, then an ISO image would be created in the Destination Folder, which you can burn to a DVD at your leisure. If you had not checked the 'Create an ISO image' and 'Burn Project to disc' option, then follow these steps.
Open the destination folder you had specified previously, there you would see a folder 'dvd'. Inside this folder would be two folders AUDIO_TS and VIDEO_TS, burn these folders onto a DVD using Nero, ImgBurn etc. and that's it, we're done.
Check out some screenshots below..
To let you know the ease with which you can convert your video files to DVD using DVD Flick, let me summarize everything written above.
Add Title(s)->Specify the Project Destination Folder->Open Project Settings->General (Encoder Priority), Burning->Create DVD.
If you happen to find an alternative to DVD Flick which performs better, let us know by posting a comment 🙂 You may be interested in knowing about the DVD Region codes that companies employ to restrict the use of a DVD in a particular location.
Technorati Tags: divx, flick, video, dvd


