How to install plugins, extensions, Greasemonkey scripts in Chrome Browser?
 Google Chrome had been a victim of debates earlier that it has no support for extensions. Now that extensions and plugins are supported in and out, many people have readily accepted it as their default browser. Not only plugins and extensions, Chrome also has built-in support for Greasemonkey scripts which needs to be enabled separately. In this article we will tell you how to set up your Google Chrome browser for installing plugins, extensions and greasemonkey scripts in it.
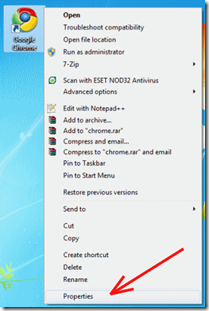
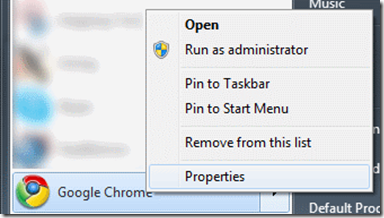
1. First you have to modify the target path of the link from where you access Google Chrome. This may be either your desktop or from the start menu. If from the desktop, then right click on the Chrome icon and click on properties. Similarly you can also right click on the Chrome tab in the start menu and click on properties. Check the screenshots below:
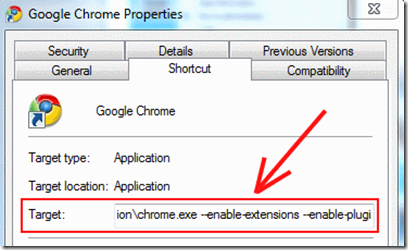
2. Now you have to edit the target field and append the following as required:
To Enable Plugins: --enable-plugins
To Enable Extensions: --enable-extensions
To Enable Greasemonkey Scripts: --enable-greasemonkey
You can also use all these options together for better compatibility with almost all kind of scripts: --enable-plugins --enable-extensions --enable-greasemonkey
3. Click on apply and start Chrome. Now you are ready to install Plugins and Extensions in the Chrome Browser.


