 Google’s tablet operating system is a little different from the versions of Android which have seen before. Android Honeycomb tablets such as the T-Mobile 7″ Google tablet are designed to take full advantage of the extra screen space –so it’s up to the user to decide how to utilize it. Initially there might be a disturbance due to the complexities of the Honeycomb, but after getting hands-on, the personalization part becomes duck soup.
Here’s a quick guide to help you get started.
Your Home Screen
Let’s begin with the home screen. The Android Honeycomb home screen keeps all of the OS’s main controls visible on the tablet’s display always on the right side.
- At the top left corner of the screen sits a Google search box. It lets you simultaneously search the Internet and everything on your device.
- Next to the search box is a microphone icon that activates Google’s Voice Actions system. It can be used to speak commands such as “listen to” followed by the name of an artist, album, or song; “send e-mail to” followed by the name of a contact and a message. One can also speak any phrase to launch an instant Web search
- At the top right of the screen is a six-square icon with the label ‘Apps’. Touch it for access to the full menu of applications installed on your tablet.
- Next to the ‘Apps’ icon is a large white plus sign. It opens the tool for customizing your tablet’s home screens.
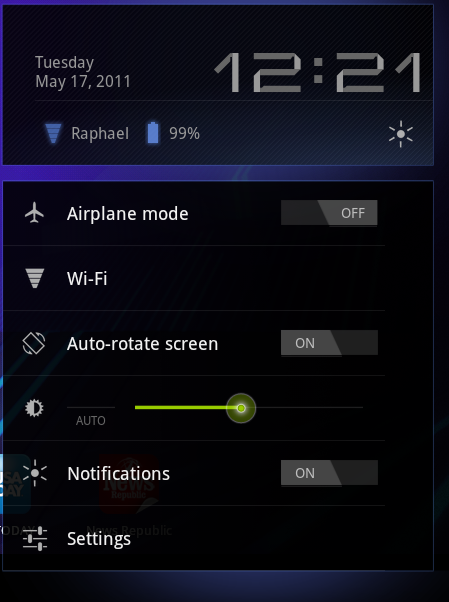
- The system clock, network connection icon, and battery level icon are in the lower-right portion of the home screen.
 Navigating Around in Honeycomb
Back, Home, and Multitasking are main navigation options, present everywhere irrespective of your location in the Honeycomb.
- Back arrow – to jump back one step and is handy when we are in applications.
- Home icon – takes back to the home screen.
- Multitasking menu shows a list of recently apps and allows to jump directly to any of them from anywhere in the system.
Occasionally, a fourth small grid-like icon may appear in the bottom-left portion of the screen when a smartphone app that isn’t optimized for the Honeycomb interface is used. When you work with optimized apps for Honeycomb, the grid icon is supplanted by what Google likes to call the ‘action bar’- letting you take various related actions for the apps.
Customizing the Honeycomb
The plus sign in the upper right corner of home screen when tapped, leads to Honeycomb’s customization control. center. In the control center, there are thumbnails of all five home-screen panels and a list of items that can be placed anywhere you like.
Below are the pics for proper look (Click to Enlarge).
Bottom-right View

Home Screen

Customizing the Tablet
Source : pcworld